HamGeek MVP DMA Board Basic Version General Firmware Direct Memory Access Clutch-Solution Enigma Ranger for LeetDMA


HamGeek MVP DMA Board Basic Version General Firmware Direct Memory Access Clutch-Solution Enigma Ranger for LeetDMA
HamGeek MVP DMA Board Basic Version General Firmware Direct Memory Access Clutch-Solution Enigma Ranger for LeetDMA
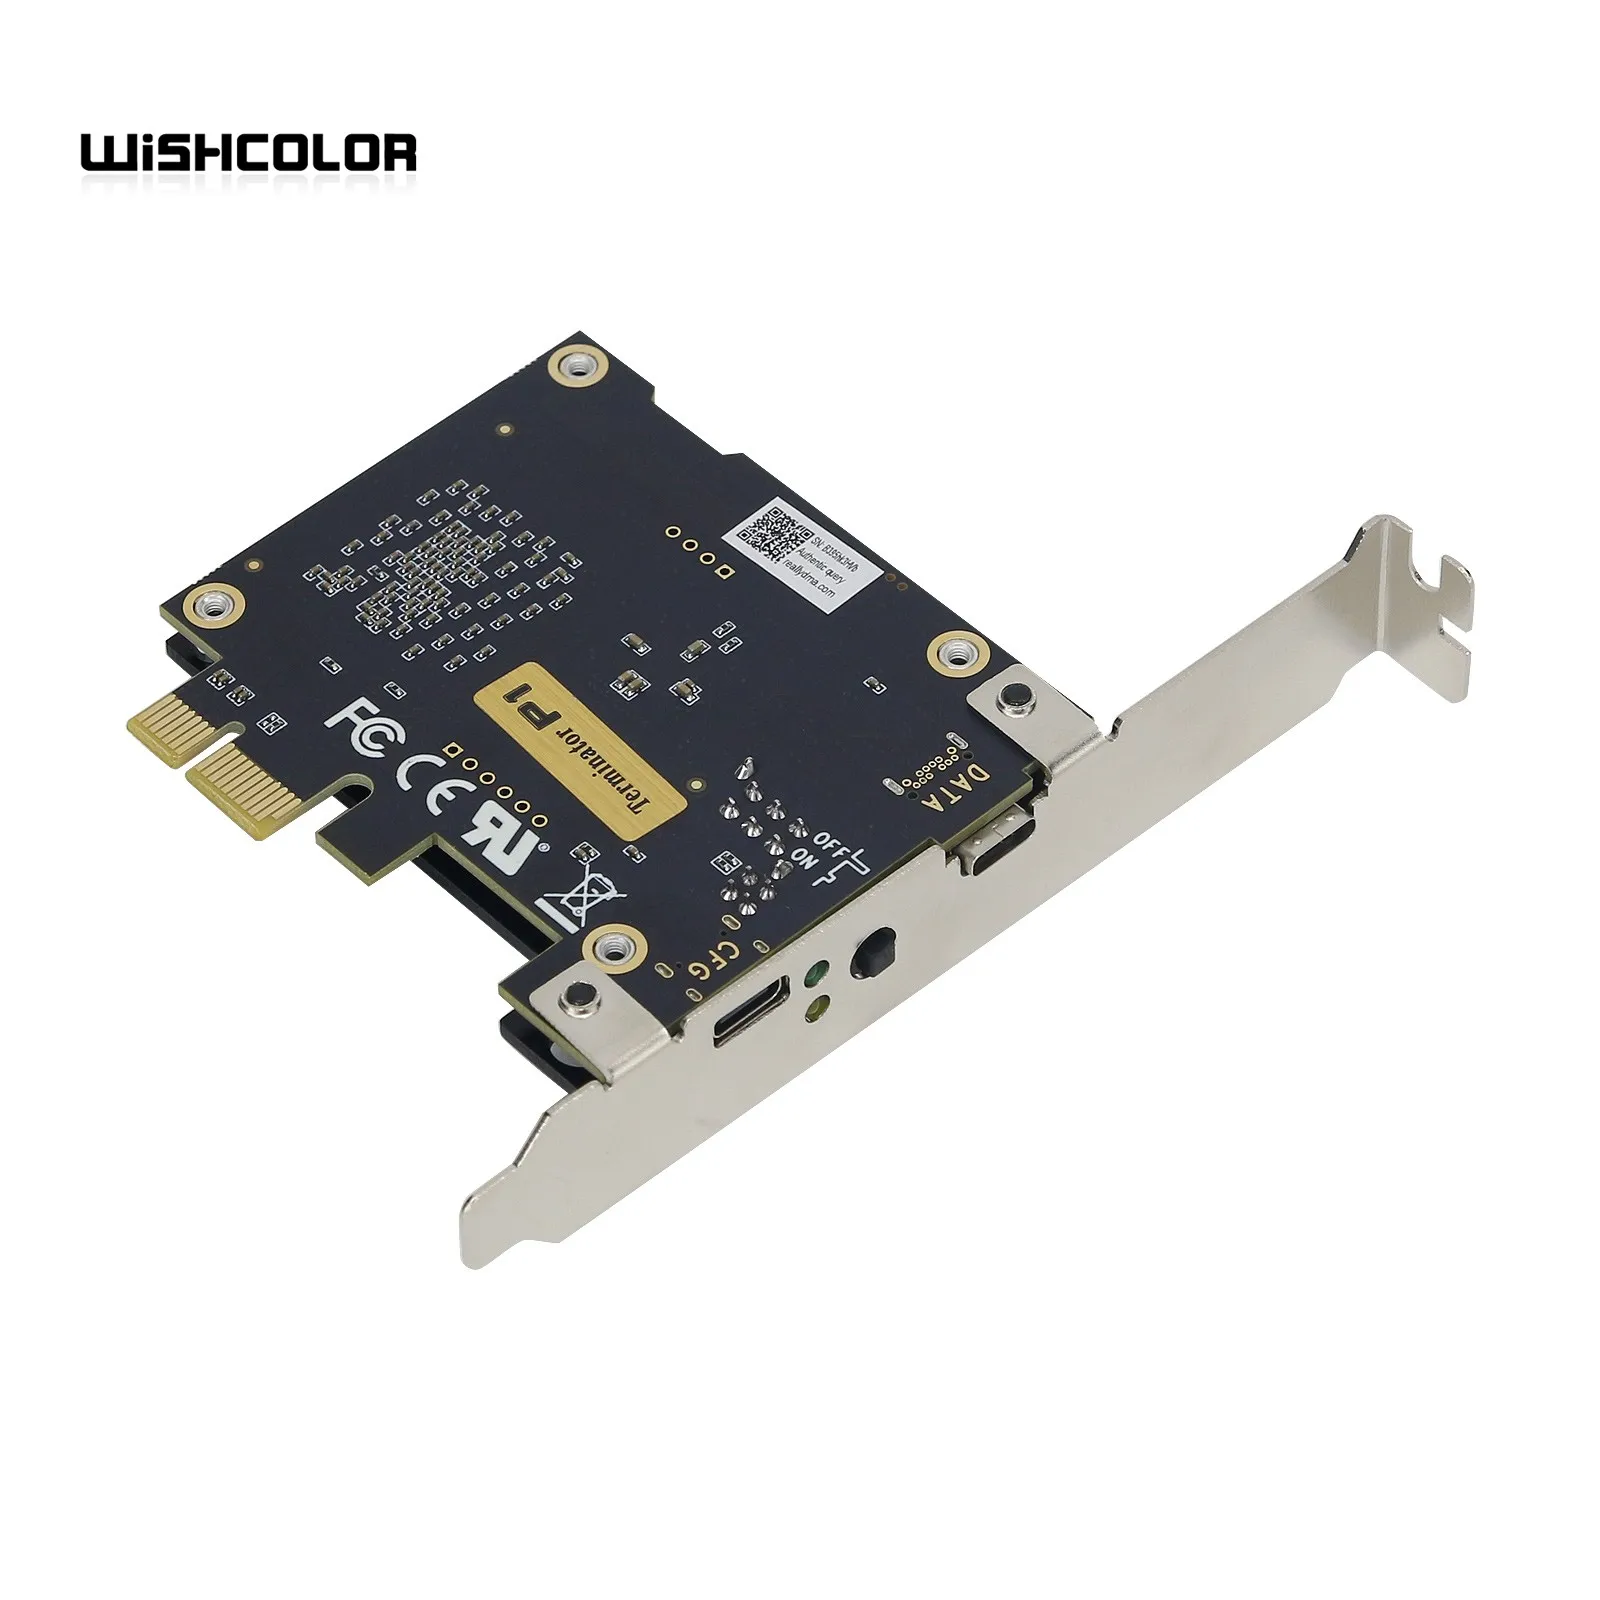
MVP DMA Board &Terminator P1 DMA Board Features:
Artix-7 FPGA
The PCIe board for LeetDMA contains a 7 series Artix-7 35T FPGA chip designed for highest performance.
SuperSpeed USB3.0
The device can communicate over USB3.0 up to 160MB/s. The FT600/FT601 is a SuperSpeed USB3.0 to FIFO interface bridge chip that provides up to 5Gbps of bandwidth.
Fully Compatible
It's 100% PCILeech compatible. PCILeech uses the PCIe board for LeetDMA to read and write to the target system memory. It is also usable with any PCILeech compatible software.
User Friendly
With the On-Board JTAG you can flash the board for LeetDMA easily with just an USB connection from the Update Port. You are not forced to use complicated JTAG cables.
Flashing
OpenOCD can be used to easily flash your own firmware to the device.
Customized Firmware
The board for LeetDMA comes pre-flashed with a fully customized firmware so it looks like a usual device for any software on the host system. Just plug it in and start using it without the need of flashing.
The board also has a physical "Kill-Switch" which can be used if you don't want to use the DMA-Board but don't want to remove it from your computer and also a connector for an external Kill-Switch.
Package Included:
- 1 x MVP DMA Board


with LCD kmbox
Kmbox B+version (B+is suitable for dual computers)
The B+version is Pro, and the dual computer is that the B computer controls the A computer. The software runs on the B computer, and the A computer does not open anything. The B+serial port is connected to the A computer, which is the same as the B version. This is a stand-alone mode.
Where the serial port is inserted, the serial port driver is installed.
Install the CH341 drive, or install the drive wizard for automatic installation.
This version is an upgraded version of kmbox B. The main differences are as follows:
1. Separate the communication serial port from the original keyboard and mouse, which can easily realize dual computer control.
(USB receiving computer A, USB2 is connected to control computer B, USB3/4 is connected to keyboard and mouse, which can realize the function of computer B controlling computer A)
The usage of the B+version is consistent with that of the kmbox VerB, and all APIs are compatible. If you need to operate dual computers, you are recommended to buy the B+version. Serial port is connected to AI analysis computer B. Controlled terminal computer A. B computer can directly control computer A.
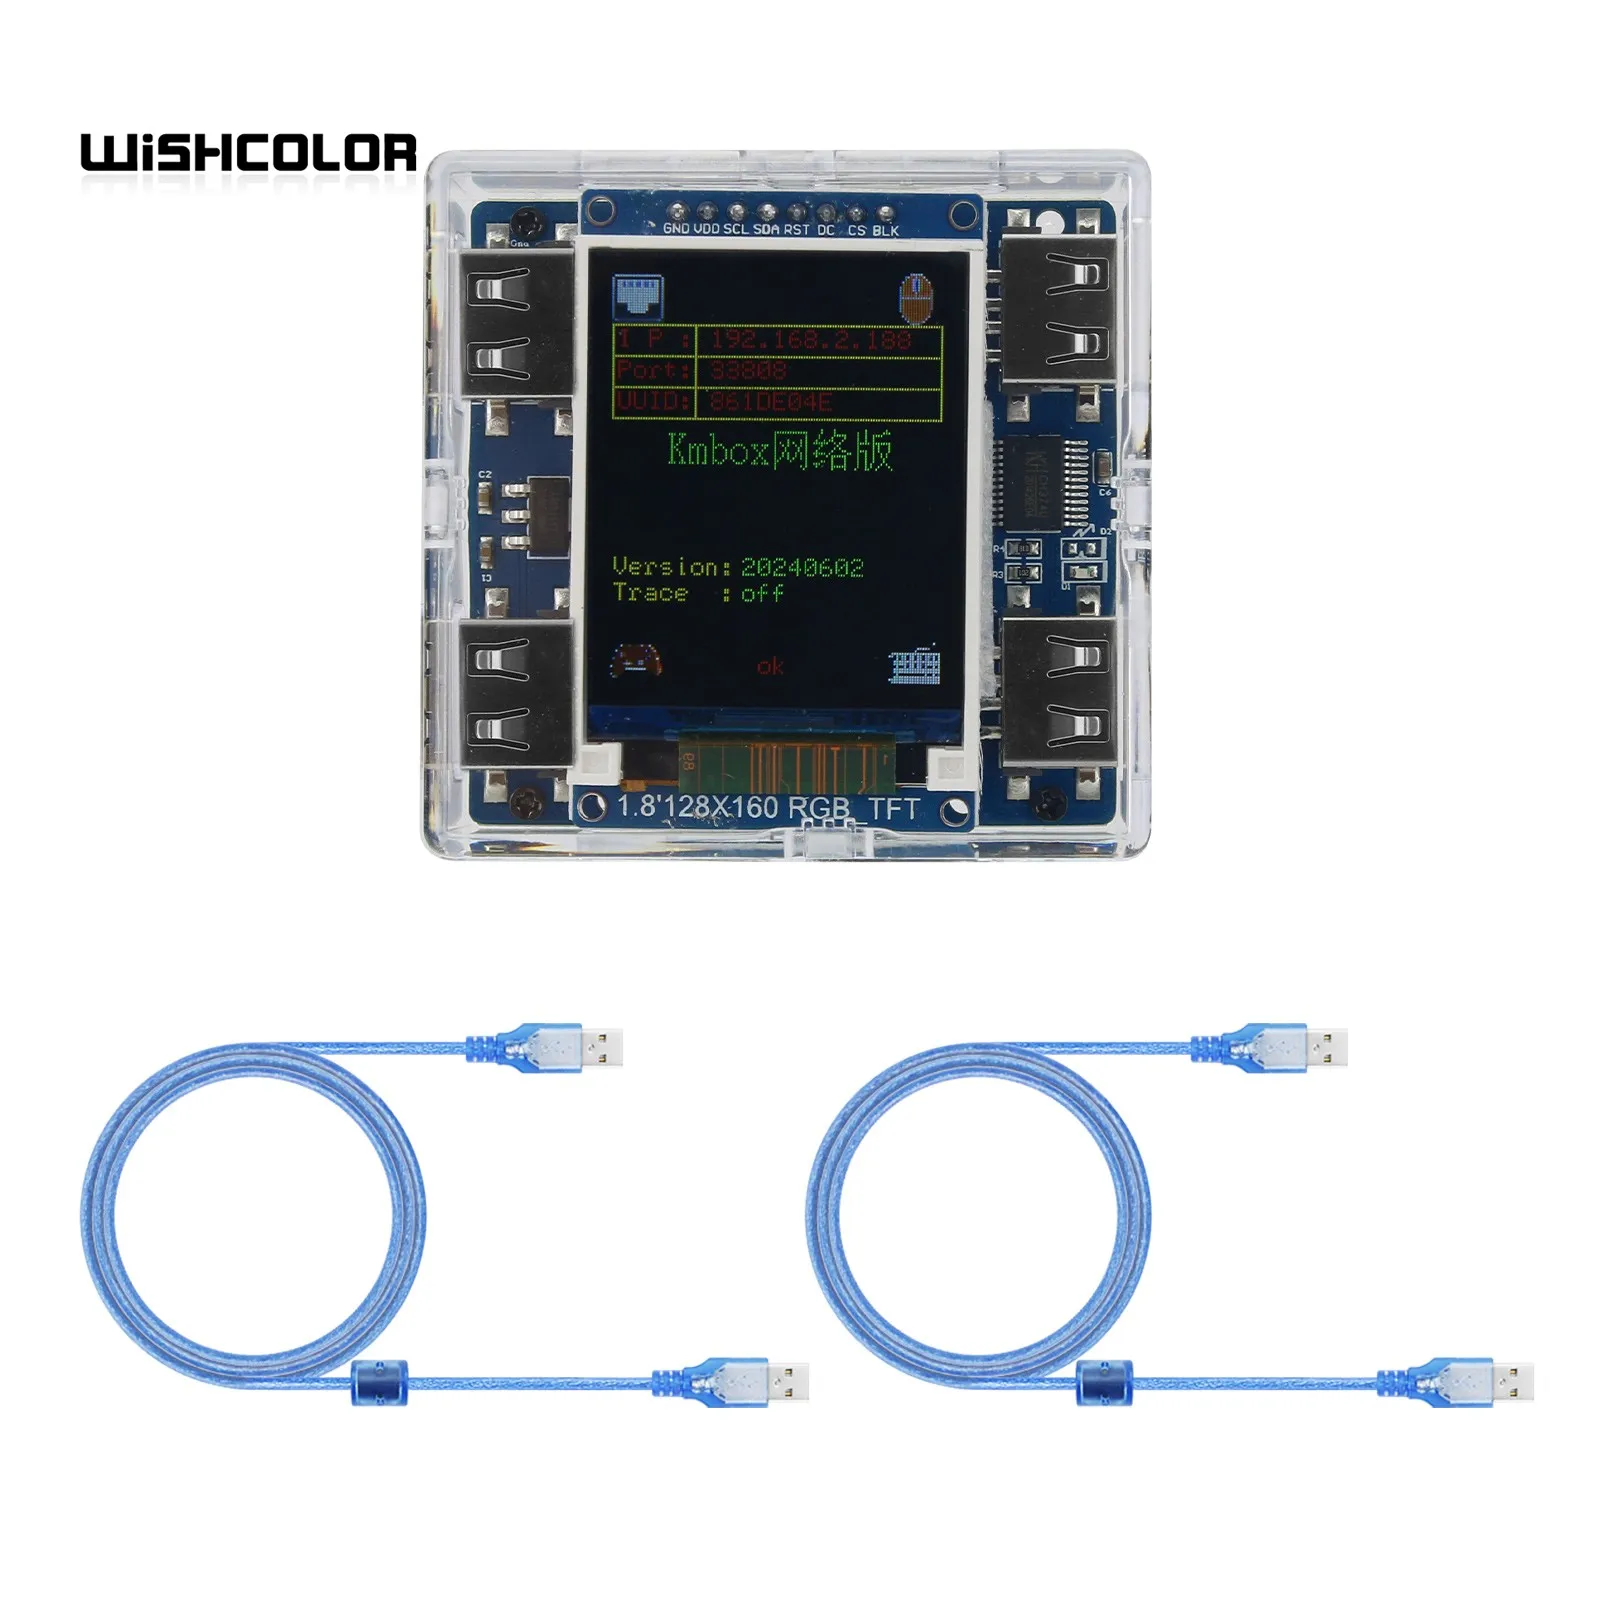
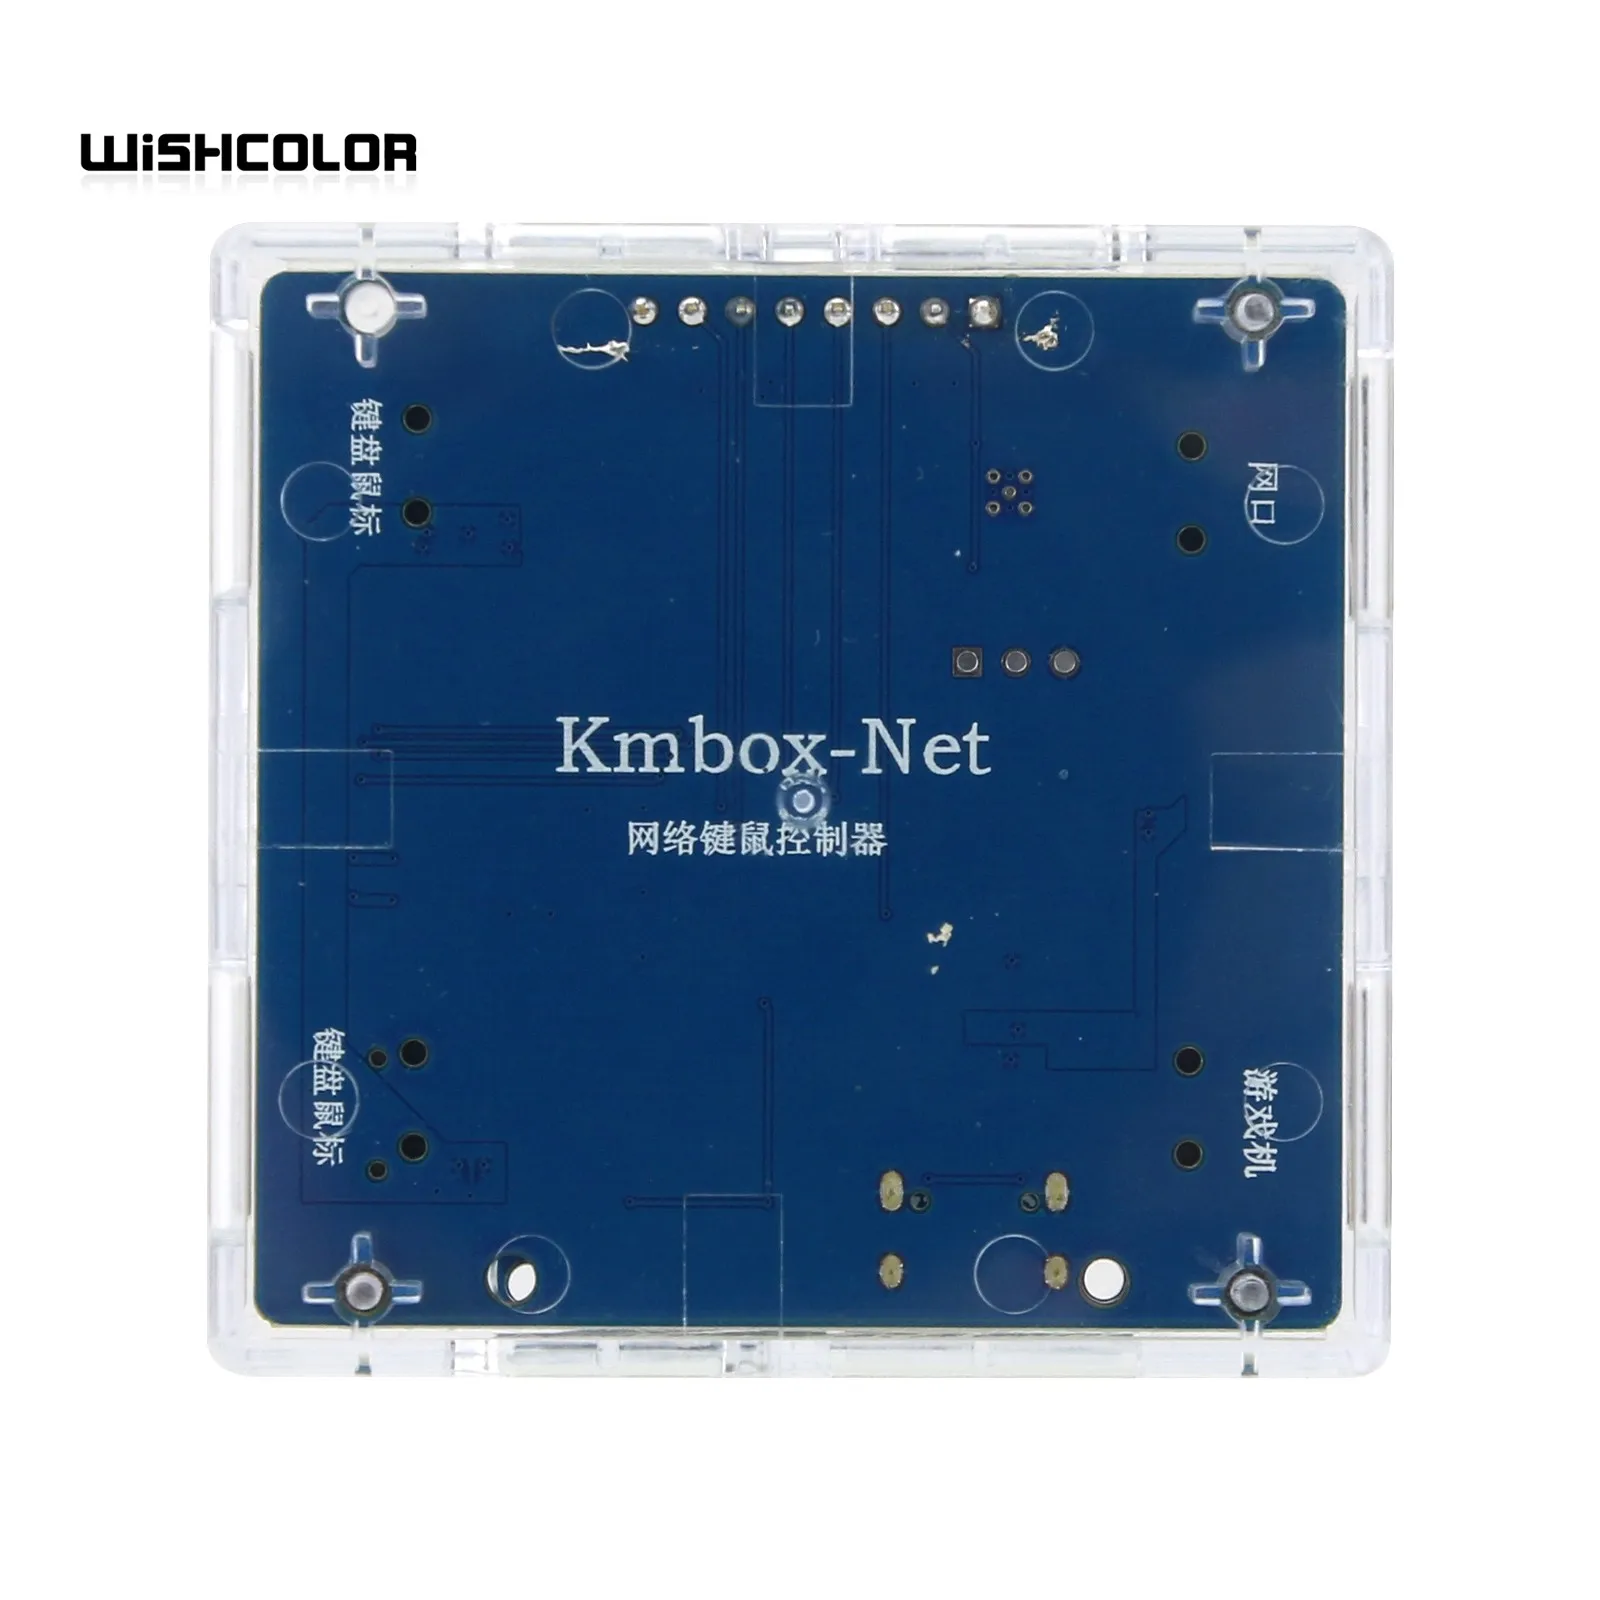
KMBox-Net Network Version 100M High Speed Keyboard and Mouse Controller High Quality Game Device for DMA/AI
Features:
- Security: its protocol is not publicly available and cannot be characterized. No need to install a driver. Each box has independent IP, port, and hardware encoding.
- Strong stability: no white screen restart when used like serial communication.
- Fast speed: the communication speed of the 100M network is 100 times that of the original B board (compared to 115200 baud rate). The number of calls per second is close to 1000. Originally, Board B only made 300 calls per second. Calling too fast will cause a white screen restart.
- Automatic default manual trajectory without keyboard and mouse data abnormalities, please refer to kmNet_ mouse_ move_ auto function.
- Strong universality: no need to adapt to a mouse.
- The Device side supports modifying all USB parameters and network updates. Everyone has different eigenvalues, which realized true one person one firmware mode.
- Friendly UI mode. It's easy to see where the problem is. Super simple operation.
- Supports all functions of the B board except for onboard scripts.
- Support monitoring of physical keyboard and mouse. Block physical keyboard and mouse functions. Easy to write software.
differenceNet is network communication, and b+Pro is serial communication
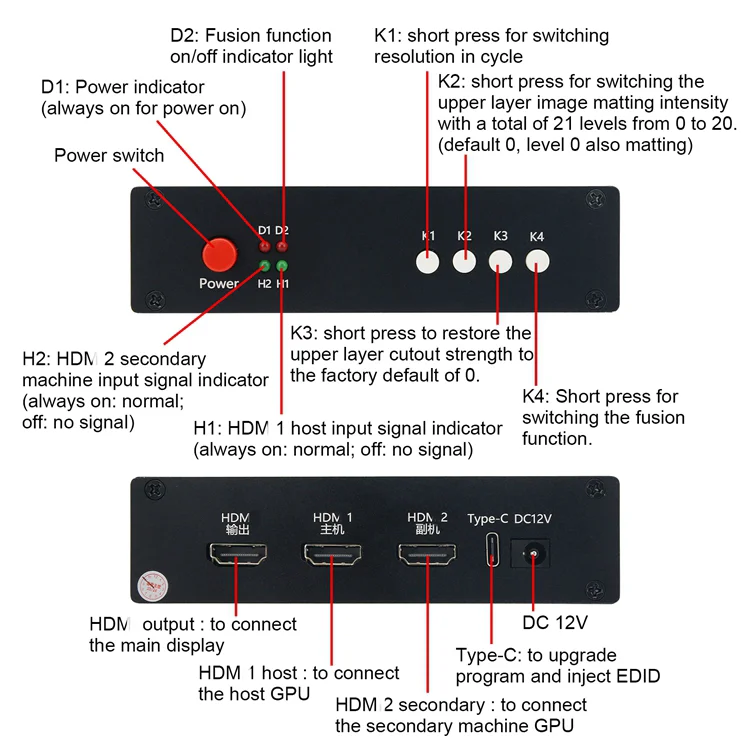
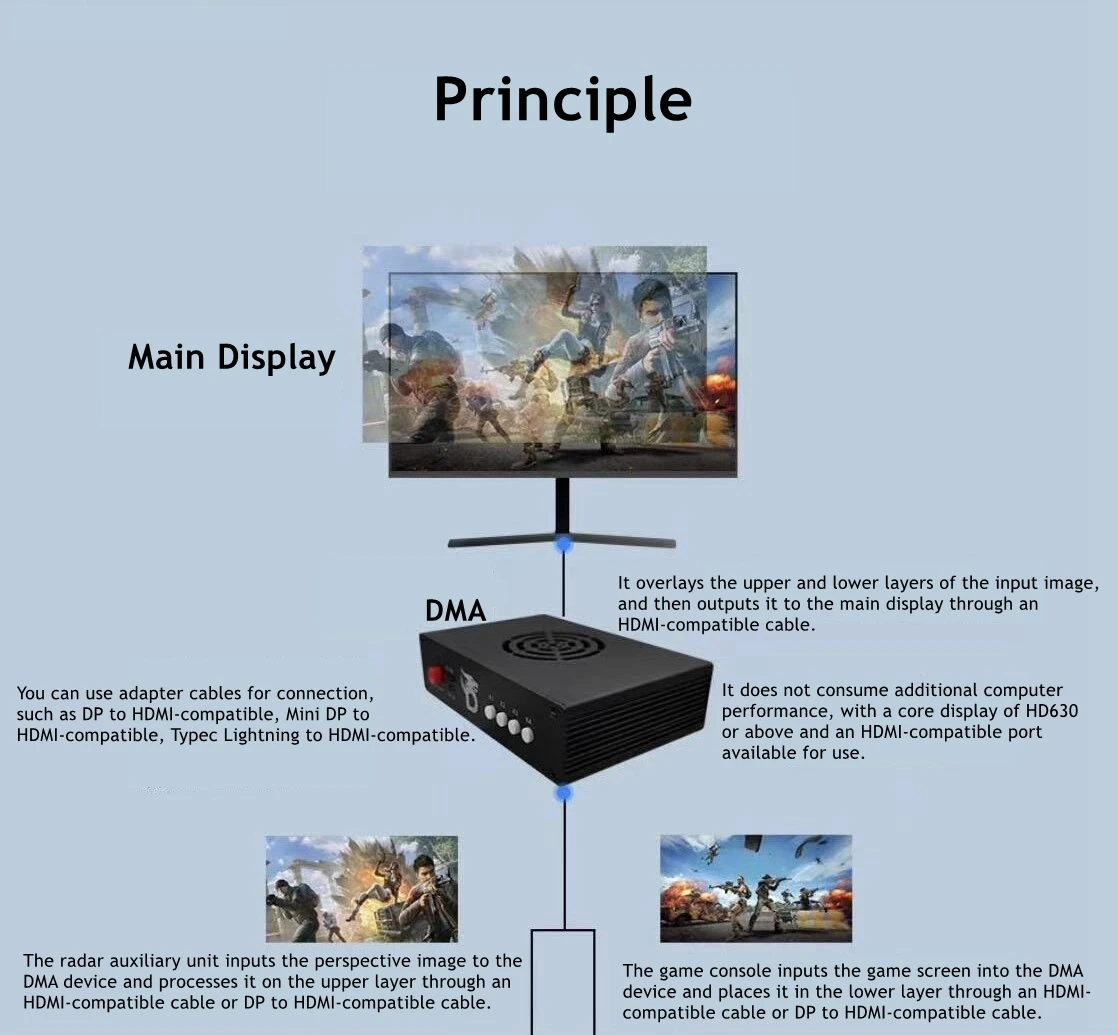
Interfaces: (Please follow the instructions to connect the HDMI-compatible cable in order)
- HDMI-compatible output: to connect the main display
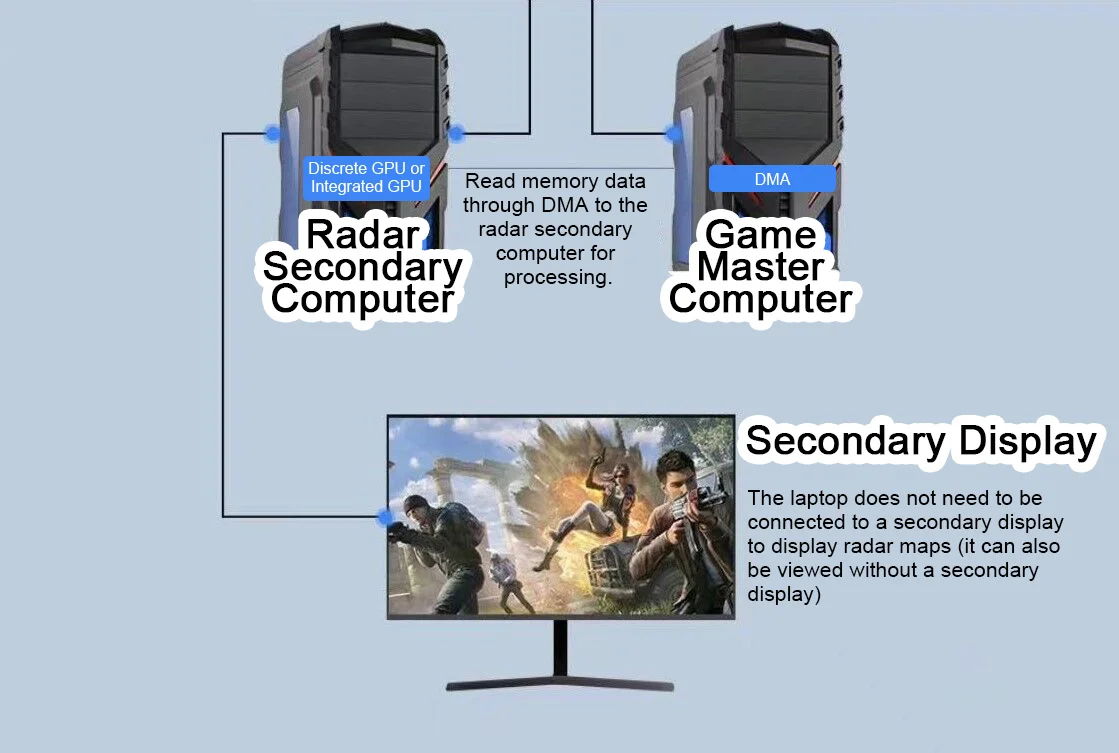
- HDMI-compatible 1 host: to connect the host GPU
- HDMI-compatible 2 secondary: to connect the secondary machine GPU
- Type-C: to upgrade program and inject EDID (only used during upgrades)
- DC 12V: power supply (default 12V 2A)
- Note: the host GPU cannot be directly connected to the main monitor with a DP or HDMI-compatible cable. If there is a connection, it must be unplugged.
Indicators:
- D1: Power indicator (always on for power on)
- D2: Fusion function on/off indicator light
- H2: HDMI-compatible 2 secondary machine input signal indicator (always on: normal; off: no signal)
- H1: HDMI-compatible 1 host input signal indicator (always on: normal; off: no signal)
Button Function:
- Power: power switch
- K1: short press for switching resolution in cycle (1920 x 1080; 2560 x 1440; 3840 x 2460; 2560 x 1080; 3440 x 1440)
- Note: long press and hold the K1 key for 3 seconds (hold until displayed): the current resolution and refresh rate are displayed in the upper left corner of the screen, with the host information on the top and the secondary information on the bottom.
- K2: short press for switching the upper layer image matting intensity with a total of 21 levels from 0 to 20. (default 0, level 0 also matting)
- K3: short press to restore the upper layer cutout strength to the factory default of 0.
- K4: Short press for switching the fusion function.
- Note: If you press the K4 key and the fusion light on, but there are no perspective fusion, there are two ways to solve this problem. One is to set the background color of the secondary unit to pure black; The second is to press the K2 key to enhance the RGB value.
Other Functions:
- Plug and play, automatic standby, memory storage, temperature controlled cooling, original picture output, extremely low latency.
Following the above wiring method and video tutorial, it still cannot solve the compatibility problem of the monitor, then it requires an upgrade. It requires adding an EDID. As following:
First Step: Read the monitor EDID
- Method: Connect the GPU of the computer host to the main monitor using an HDMI-compatible2.0 or HDMI-compatible2.1 cable (very important: it is the output of the GPU, directly connected to the main display without going through the DMA video overlay box). On the computer host, select the most suitable GPU output resolution and refresh rate (such as 2560x1440 at 144 , 1920x1080 at 240, etc.) to enable the monitor to display normally. Then install the MonitorAssetManager with the file name of mi_setup.exe. After installing, run the Monlnfo.exe and wait for it to open.
After opening, select the first one:
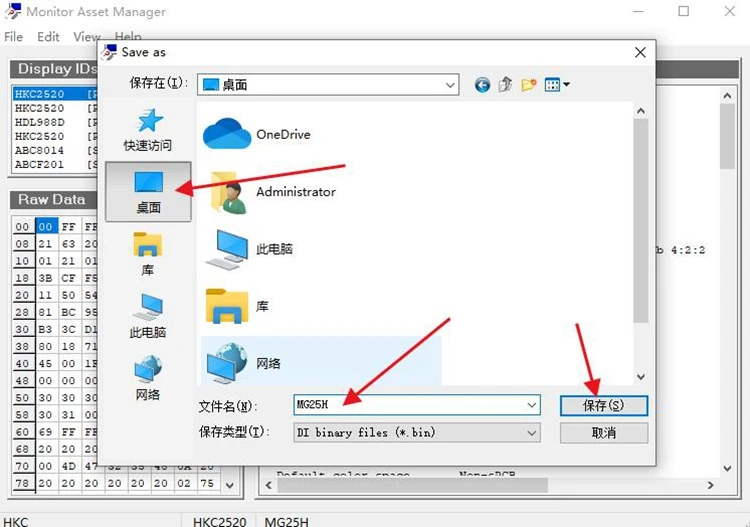
Select File, click Save as...:
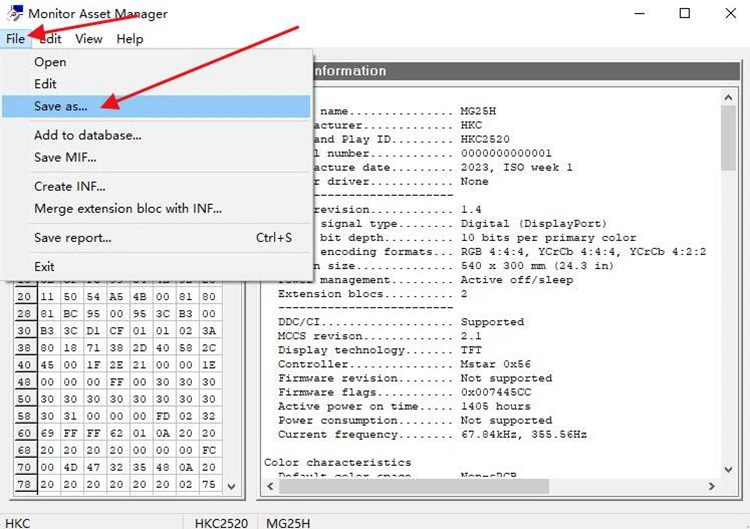
Choose the saving path, click SAVE to read the EDI Bin file:
Second Step: inject EDID to the DMA video overlay box
After saving the Bin file, insert the Type-C cable into the Type-C port of the DMA video overlay box, and connect the other end of the USB to the computer where the Bin file was just saved. (At this point, restore the normal wiring of the DMA video overlay box, that is, connect the HDMI-compatible output cable of the computer host GPU to the box, and connect the box output cable to the main monitor.) Power it on, and then turn on the box.
Next, open the [Injector tool]:
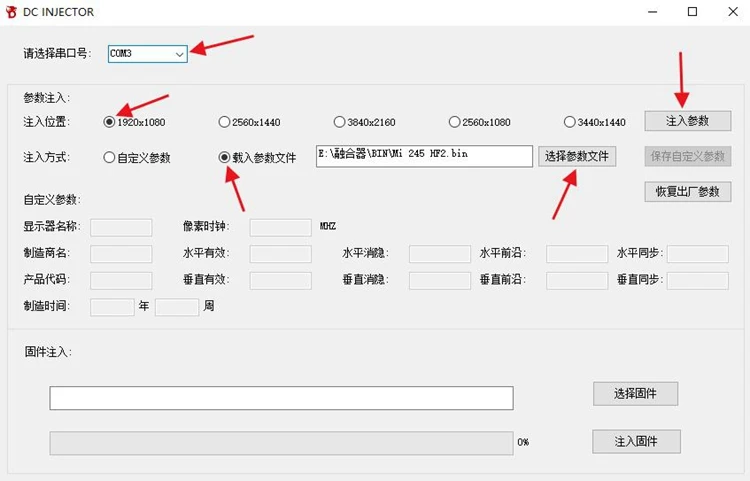
After opening, select the serial port number (if the serial port number is not correct, it will point out fail), select the correct injection location in the parameter injection (according to the resolution of the main monitor, which is the resolution set above, it is very important to choose the correct resolution), select the injection method as [Load Parameter File], select the parameter file (the saved Bin file read before), and finally click [Injection Parameters] to wait for injection. During the injection process, a black screen will appear for a while, and after completion, there will be a prompt indicating successful injection. After successful injection, unplug the Type-C cable and keep the output of the box connected to the HDMI-compatible cable to the main display.
Precaution:
- Using the previously set refresh rate for the host and secondary computers, right-click on the desktop to open 'Display Settings', check if the resolution is correct, drag to the bottom to open 'Advanced Display Settings', select the monitor (the model is the one you just injected), and set the refresh rate below to the optimal refresh rate for your monitor.
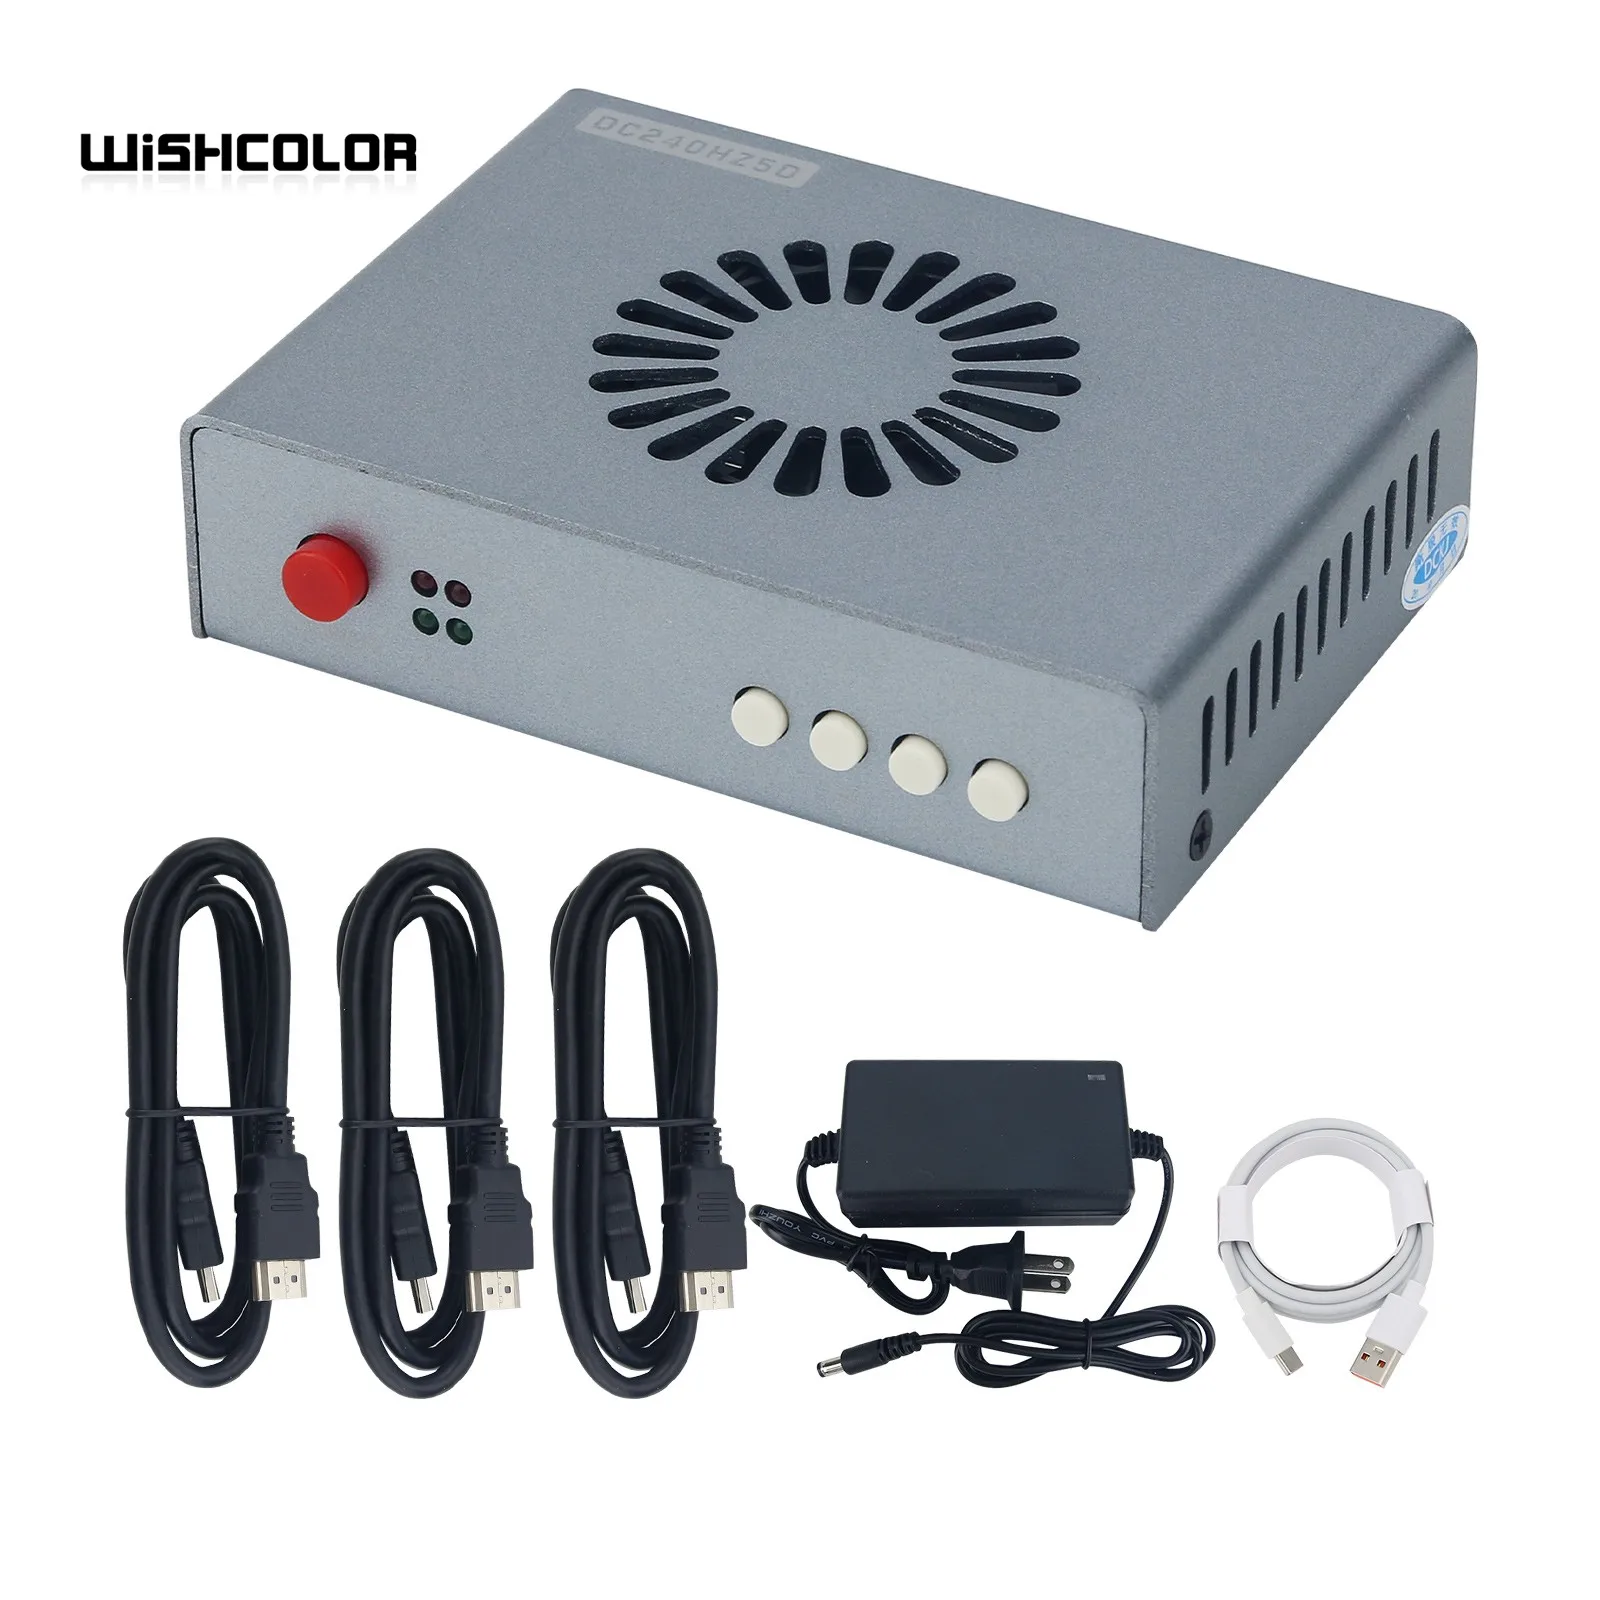
Package Included:
- 1 x Host
Note:
- The color of the real product is not the same as the product displayed in the picture.